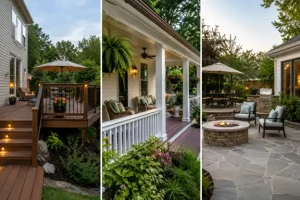
If you’ve ever imagined cozy evenings relaxing by a crackling fire under the stars, a patio with fire pit is the perfect way to bring that dream to life. Creating a fire pit patio may seem like a complex project, but with the right planning, materials, and guidance, you can design an outdoor space that’s both beautiful and functional.
In this complete step-by-step guide, we’ll walk you through everything from planning your project and choosing materials to building, safety, and styling tips. Whether you want an intimate corner for quiet nights or a vibrant gathering space for entertaining, you’ll find all the patio ideas and expert advice you need right here.
Why Add a Patio with Fire Pit to Your Backyard?
A fire pit is more than a backyard accessory—it’s a magnet for relaxation and conversation. When integrated into a well-designed patio with fire pit, it becomes the heart of your outdoor living area.
Here’s why homeowners love this addition:
- Extended outdoor season: Stay warm and comfortable outside in spring, fall, and even mild winter nights.
- Striking focal point: Fire pits anchor your patio design and bring natural movement with dancing flames.
- Entertainment hub: Gather friends and family for drinks, stories, and marshmallow roasting.
- Value boost: Professionally built or DIY, a stylish patio with a fire pit increases your home’s curb appeal and resale potential.
Step 1: Planning Your Patio Design
Planning is the foundation of every successful landscaping design project. Before lifting a shovel, take time to visualize how your fire pit and patio will interact with the rest of your outdoor space.
1. Choose Your Location
Look for a location that is:
- Safe and level (away from overhanging trees, fences, or combustible materials)
- Conveniently accessible from your house or deck
- Complementary to your existing landscape features like gardens or retaining walls
Tip: For small yards, a corner setup maximizes usable space while maintaining good airflow.
2. Decide on Fire Pit Type
You have three main options:
- Wood-burning fire pit: Offers authentic flames and campfire aroma but requires more maintenance.
- Gas fire pit: Clean, easy to use, and suitable for controlled environments.
- Smokeless fire pit: A modern and eco-friendly alternative with high efficiency.
3. Determine Patio Shape and Size
Common shapes include circular, square, or free-form designs.
- For intimate settings, aim for 10–12 feet in diameter.
- For entertainment spaces, expand to 16 feet or more to allow seating and pathways.
Step 2: Selecting Materials
The beauty and durability of your patio with fire pit depend largely on the materials you choose.
Popular Patio Materials:
- Pavers: Affordable, versatile, and available in a variety of colors and textures.
- Natural stone (flagstone, bluestone): Adds elegance and timeless appeal.
- Concrete: Budget-friendly and highly customizable with stamped or stained finishes.
- Gravel: Great for rustic, low-maintenance designs.
Fire Pit Materials:
- Fire-rated bricks or stones: Handle high heat safely.
- Steel rings or inserts: Protect masonry from prolonged direct heat.
- Lava rocks or fire glass: Decorative and functional heat diffusers.
Combine materials creatively—paver patio with a natural stone fire pit surround looks luxurious and cohesive.
Step 3: Gathering Tools and Supplies
To keep the process smooth, gather your essential tools early for your patio with fire pit project.
Basic Tools:
- Shovel and rake
- Tape measure and marking paint
- Level and string line
- Tamper or plate compactor
- Rubber mallet
- Masonry saw (if cutting pavers)
Materials Checklist:
- Patio pavers or stones
- Sand and crushed gravel base
- Fire pit kit or masonry blocks
- Landscape fabric
- Adhesive or mortar
- Seating and decorative accents
Step 4: Preparing the Foundation
A stable foundation ensures your patio lasts for years without shifting or sinking.
1. Mark the Layout
Sketch your patio shape using turf paint or string. Include your fire pit placement and seating zones.
2. Excavate the Area
Dig to a depth of 6–8 inches for patios (deeper if soil drains poorly). Ensure the excavation is even and slopes slightly away from your home (about 1 inch every 4 feet) for proper drainage.
3. Add Base Layers
- Spread 2–3 inches of crushed gravel, compact thoroughly.
- Add another 2 inches of leveling sand, smoothing it with a screed board and checking for level.
- Lay landscape fabric under the gravel if you want to minimize weed growth.
Pro tip: Take your time compacting—this step affects everything that follows.
Step 5: Building the Fire Pit Base
Now it’s time to start shaping the star of your project: the patio with fire pit.
1. Lay the First Layer
Arrange your first circle of fire pit blocks directly on the prepared sand. Use a level to ensure accuracy.
2. Stack and Secure
Dry-stack or adhere additional layers (typically 2–4 high) using masonry adhesive or mortar. Stagger seams to create a strong, visually appealing structure.
3. Install the Fire Ring
If using a metal insert, place it in the center once the walls are complete. This liner increases durability and directs heat upward.
4. Add Fire Media
Fill the pit with 2–3 inches of fire-safe material—lava rock, sand, or glass beads—to help distribute heat and protect the base.
Step 6: Laying the Patio Surface
This is where your patio with fire pit vision truly takes shape.
1. Start from the Center Outward
Begin laying pavers or stones from the center of the fire pit and work outwards. This ensures symmetry and balance.
2. Maintain Consistent Gaps
Use spacers to keep joints even. Regularly check with a level as you move outward.
3. Make Precision Cuts
Trim edges using a masonry saw to fit your layout neatly around curves or corners.
4. Fill the Joints
Once all stones are placed, brush fine sand or polymeric sand into the gaps. Mist lightly with water to lock everything in place.
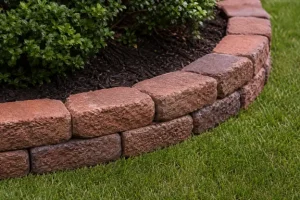
Step 7: Edging and Finishing Touches
Edge restraints keep your patio intact and prevent pavers from shifting. You can:
- Use plastic or metal edging anchored with spikes
- Add a concrete border
- Integrate a natural stone perimeter for a finished look
Smooth out surrounding soil and reseed grass if needed.
Step 8: Safety and Maintenance
Your patio with fire pit should be both inviting and safe.
Safety Tips:
- Keep at least 10 feet between the fire pit and any structure or flammable surface.
- Use a spark screen to contain embers.
- Avoid burning softwoods like pine—they pop and release resin.
- Always supervise fires and keep a bucket of sand or hose nearby.
Maintenance:
- Sweep your patio regularly and rinse occasionally.
- Refill sand joints annually to prevent weeds.
- Check fire pit masonry each season for cracks or loosening stones.
Step 9: Decorating Your Fire Pit Patio
Here’s where design creativity shines. Combining comfort and style will make your patio with fire pit the go-to retreat for family and guests.
Furniture Ideas:
- Adirondack chairs for rustic charm.
- Outdoor sectional seating for larger gatherings.
- Built-in stone benches for cohesive design.
Lighting:
- String lights overhead for ambiance.
- Pathway lights for safety and soft glow.
- Lanterns or candles for accent illumination.
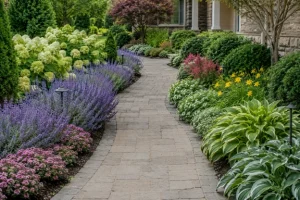
Landscaping Accents:
- Surround your patio with ornamental grasses, flowering shrubs, or low hedges for privacy.
- Add potted plants or succulent arrangements for color.
- Include gravel pathways or garden steps connecting to the rest of your yard.
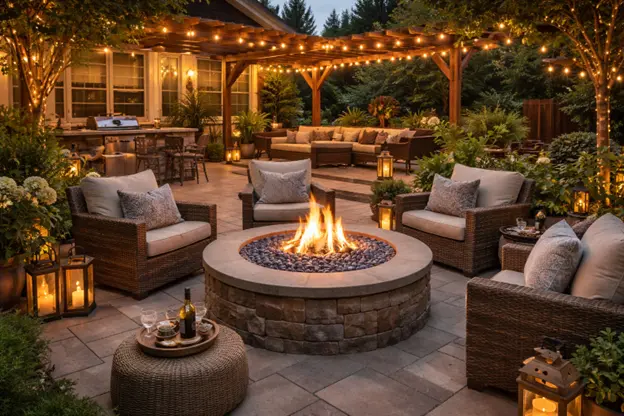
Example: A circular paver patio with a gas fire pit, wrapped in low boxwoods and solar lighting, creates a modern and functional retreat.
Step 10: Adding a Personal Touch
Make your fire pit patio reflect how you love to live outdoors.
- Rustic style: Use reclaimed stone and wood accents.
- Modern look: Go for sleek concrete and minimalist furniture.
- Coastal vibe: Light pavers, natural driftwood, and woven textures.
- Family-friendly setup: Include s’mores stations or built-in bench storage.
Consider your lifestyle—do you entertain often or prefer quiet retreats? Your design should support how you’ll actually use the space.
Step 11: Enjoying Your New Outdoor Space
You’ve done the planning, building, and decorating—now it’s time to enjoy it. Imagine:
- Hosting weekend gatherings
- Unwinding by the fire after a long workday
- Watching the sunset with a hot drink in hand
Your newly crafted patio with fire pit will instantly become the heart of your home’s outdoor living.
Pro Tips for Long-Term Success
- Think about wind patterns before finalizing the location—smoke direction matters.
- Choose high-quality pavers rated for freeze-thaw cycles in colder regions.
- Seal your patio surface to resist stains and moisture.
- Integrate drainage solutions, such as a french drain or channel system, for storm-heavy regions.
- Schedule annual maintenance or inspections if you installed a gas fire pit.
Eco-Friendly Options
Want to make your patio more sustainable? Consider these choices:
- Use permeable pavers that allow rainwater to filter naturally.
- Incorporate recycled aggregates for your base material.
- Select solar-powered lighting for pathways and fixture accents.
- Plant native vegetation around your patio to support local wildlife.
Your backyard can be both stunning and environmentally responsible—a win-win for comfort and conscience.
Bringing It All Together
Building a patio with fire pit blends craftsmanship, design, and creativity into one rewarding project. By following this step-by-step guide, you can confidently create an outdoor retreat that fits your style, needs, and budget.
Whether you envision family evenings by the fire or elegant backyard events, your patio will soon be more than a place—it becomes an experience. From classic stonework to modern designs, the possibilities are endless.
Create Your Perfect Patio with Fire Pit
If you love the idea but don’t have the time or tools to DIY, let the professionals handle it for you. At Hawkins Landscaping Inc., our expert landscaping design team can bring your dream patio with fire pit to life with precision and creativity. From selecting the perfect pavers or natural stone to incorporating custom lighting, fire features, and finishing details, we manage every step of the process—so you can simply relax and enjoy results built to last for years.
Proudly serving Frederick County and surrounding areas for over 50 years, we specialize in custom patio designs and full outdoor living transformations tailored to your home, lifestyle, and budget.
Call (301) 898-3615 or visit hawkinslandscaping.com to schedule your consultation and discover custom patio ideas built specifically for your home. Ask about our flexible financing options and let’s turn your patio for backyard vision into a stunning outdoor masterpiece.