Retaining walls are vital landscape features, offering both structural support and visual appeal. More than just functional barriers, they manage soil erosion, shape usable outdoor spaces, and add definition to the landscape. Yet, building a retaining wall that truly stands the test of time involves far more than stacking stones or concrete blocks in place.
It demands a thorough understanding of soil behavior, drainage principles, and load dynamics—skills that go beyond basic construction know-how. Proper planning ensures the wall serves its intended function effectively, whether that’s holding back tons of earth on a slope or enhancing a garden’s layout. Execution must be precise, using durable materials and engineering-grade techniques to prevent failure caused by water pressure, soil movement, or poor reinforcement.
Additionally, long-term success hinges on ongoing care: regular inspections, drainage upkeep, and vegetation control are all essential to preserving the wall’s integrity. Whether you’re taking on a DIY project or hiring a contractor, a well-informed approach is critical.

11 Simple Steps to Build Strong and Lasting Retaining Walls
This comprehensive guide covers everything from design and material selection to construction best practices and maintenance strategies—equipping you with the knowledge to build a retaining wall that’s not only sturdy and safe but also a standout feature in your landscape.
1. Start with Thorough Planning and Design
Purpose and Placement:
Begin by identifying the wall’s purpose: is it to prevent erosion, create level planting areas, or serve as a decorative element? Clearly outlining the wall’s function will inform its design and material selection.
Measuring and Marking:
Use stakes and string (for straight walls) or a garden hose/rope (for curves) to map out the exact location and shape. This ensures the wall fits seamlessly into your landscape and meets your needs.
Local Regulations:
Check local building codes. Many municipalities require permits for walls over a certain height, typically 3–4 feet. Compliance avoids costly rework or legal issues.
2. Understand Soil and Load Analysis
Soil Assessment:
Conduct a geotechnical assessment to determine the soil’s load-bearing capacity, drainage characteristics, and slope stability. This is crucial for walls retaining significant soil or located near structures.
Load Calculations:
Calculate lateral earth pressure and consider external loads, such as vehicles or adjacent buildings. Proper engineering prevents structural failures like bulging, tilting, or collapse.
3. Choose the Right Materials for Strength and Longevity
|
Material |
Pros |
Best Use Cases |
|
Concrete Blocks |
High strength, modular, affordable, customizable |
Most residential/commercial |
|
Natural Stone |
Durable, aesthetic, weathers naturally |
High-end, rustic, or curved |
|
Bricks |
Classic look, strong, good for small/medium walls |
Decorative, garden borders |
|
Timber |
Warm appearance, easy to work with |
Low walls, rustic settings |
- Concrete blocks are popular for their strength and flexibility, especially for DIYers and professionals alike.
- Natural stone offers unmatched durability and a timeless look, ideal for premium projects.
- Armour stone and high-performance aggregates are recommended for demanding applications due to their weight and weather resistance.
- Timber is best for small, decorative walls but has a shorter lifespan than stone or concrete.
4. Build a Solid Foundation
Excavation:
Dig a trench down to stable subsoil, typically 6–12 inches deep, depending on wall height. The trench should be wide enough to accommodate the base layer.
Base Preparation:
Lay 4–6 inches of compacted gravel or crushed stone as a base. This provides drainage and prevents shifting, which is critical for long-term stability.
5. Precision in Construction Techniques
First Course:
The first row of stones or blocks is the most important. Lay them tightly together and level each piece carefully using a spirit level and a rubber mallet.
Stacking and Staggering:
Stagger the joints between each layer, similar to brickwork, to avoid continuous vertical seams. This distributes pressure and increases strength.
Backfilling:
As you build, backfill with gravel or coarse aggregate behind each layer. Compact the backfill in layers to minimize settlement and improve wall stability.
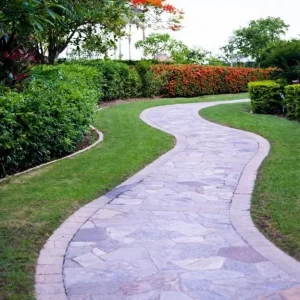
Handling Curves and Slopes:
Use custom-cut stones or modular systems for curves and uneven terrain. This maintains consistency and structural integrity.
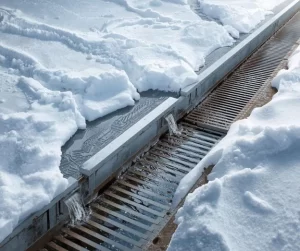
6. Incorporate Effective Drainage Systems
Why Drainage Matters:
Water buildup behind a wall increases hydrostatic pressure, which is a leading cause of wall failure.
Drainage Solutions:
- Perforated Drain Pipe: Place a perforated pipe at the base of the wall to direct water away.
- Gravel Backfill: Use well-graded, permeable aggregate instead of soil or sand to promote drainage.
- Weep Holes: Install weep holes at regular intervals to allow water to escape.
- Geotextile Fabric: Place fabric between the soil and backfill to prevent soil migration, which can clog drainage systems.
7. Reinforce for Extra Strength
Geogrid Reinforcement:
For taller or heavily loaded walls, use geogrid—a synthetic mesh laid horizontally into the backfill at intervals (usually every 1–2 courses). This creates a reinforced soil mass, dramatically increasing stability.
Tiebacks and Deadmen:
For timber walls, use anchors or deadmen (perpendicular timbers connected to the wall and buried in the soil) to resist tipping and sliding.
Concrete and Steel Reinforcement:
For concrete or block walls, embed rebar within the structure according to engineering specifications. This ties the wall together and resists cracking or bowing.
Soil Nailing:
In specialized situations, drive steel bars into the slope and combine with shotcrete facing for maximum stability. This is typically reserved for large or commercial projects.
8. Finish with Capstones and Details
Capstones:
Top the wall with capstones for a finished look and added stability. Secure them with construction adhesive or mortar.
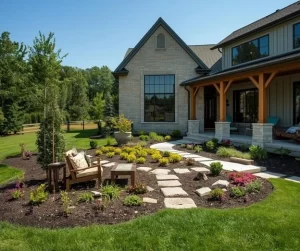
Aesthetic Touches:
Consider using decorative blocks, natural stone veneers, or integrated lighting for added curb appeal.
9. Long-Term Maintenance for Durability
Regular Inspections:
Inspect your wall at least twice a year, ideally in spring and fall. Look for cracks, bulging, leaning, or changes in surrounding soil.
Drainage Maintenance:
Ensure weep holes and drainage pipes remain clear of debris and roots. Blocked drainage can lead to water buildup and structural damage.
Repair Minor Issues Promptly:
Address small cracks or shifted blocks immediately. Early repairs prevent more extensive (and expensive) damage later.
Vegetation Management:
Trim plants near the wall and remove invasive roots that could undermine the structure. Choose non-invasive species for landscaping near retaining walls.
Backfill Monitoring:
Check the backfill for signs of settlement or waterlogging. Replenish or recompact as needed to maintain stability.
10. Common Mistakes to Avoid
- Skipping Drainage: Never forgo drainage systems; water pressure is the most common cause of wall failure.
- Inadequate Base: A thin or poorly compacted base leads to settling and instability.
- Ignoring Soil Conditions: Failing to assess soil type and load can result in poor design and premature failure.
- Improper Material Selection: Using low-quality or inappropriate materials reduces lifespan and increases maintenance.
- Lack of Reinforcement: For taller or load-bearing walls, reinforcement is essential for safety and longevity.
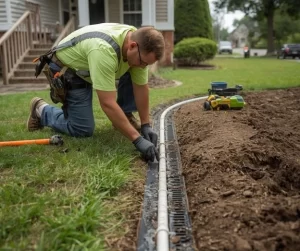
11. When to Hire a Professional
While DIY construction is possible for small, low walls, consult a professional for:
- Walls over 4 feet tall
- Complex site conditions (steep slopes, poor soil, nearby structures)
- High-load or commercial applications
Professionals can provide engineering calculations, advanced reinforcement, and ensure compliance with local codes for a safe, long-lasting result.
Conclusion: Retaining Walls That Last Start with Smart Planning and Care
Building a strong, long-lasting retaining wall is a blend of art and science, requiring both technical knowledge and aesthetic sensibility. It’s not merely about stacking materials—it’s about engineering a system that responds effectively to the forces of nature, especially gravity, water, and soil movement. Success begins with thorough planning and design, where understanding the purpose of the wall, evaluating site conditions, and complying with local codes lay a solid foundation.
Equally important is the application of soil mechanics, which influence how the wall bears loads, resists pressure, and drains water. Selecting the right materials—whether it’s concrete blocks, natural stone, or timber—ensures that both structural integrity and visual harmony are achieved. Every construction step must be executed with precision, from laying a stable base and backfilling correctly to integrating proper drainage and reinforcement.
However, the job doesn’t end once the wall is built. Ongoing maintenance is crucial for ensuring that minor issues don’t evolve into major structural failures. Regular inspections, vegetation control, and maintaining clean drainage paths help preserve the wall’s integrity for years to come.
In essence, a retaining wall that performs well and looks great for decades is the result of intentional choices at every stage—from planning and materials to construction and upkeep. By applying the expert strategies outlined in this guide, you’ll not only create a structure that withstands time and nature but also adds long-term value, functionality, and curb appeal to your property.
For expert retaining wall design and construction, contact Hawkins Landscaping Inc. at (301) 898-3615 or visit their website at www.hawkinslandscaping.com to explore their full range of landscaping services and schedule a consultation.