October evenings invite you to enjoy the backyard differently. Outdoor dinners become more relaxed, blankets appear on lounge chairs, and a quiet patio can feel like the most comfortable room at home. But as darkness arrives earlier, good patio lighting helps keep that space welcoming and easy to use.
The best patio lights combine soft atmosphere with clear visibility. Rather than relying on one bright floodlight, use a thoughtful mix of lighting for seating, dining, cooking, steps, and walkways. The goal is to illuminate what you need without overwhelming the evening.
This guide explores practical patio ideas, fixture choices, installation considerations, and fall maintenance. Whether you are refreshing an existing space or planning patio installation, these strategies can help create a comfortable outdoor setting.
Start With Comfort When Planning Patio Lighting
A brightly lit patio is not necessarily a comfortable patio. An exposed bulb beside a lounge chair can create glare, while a powerful wall light may leave steps in deep shadow. More light does not automatically mean better visibility.
The National Park Service recommends lighting only where necessary, using the lowest effective output, and choosing fixtures that prevent light from spilling beyond the intended area. It also notes that excessive brightness can reduce visibility rather than improve it.
Begin by asking what each light needs to accomplish. A dining table needs enough illumination to see food and faces. A grill needs focused task lighting. Steps need visible edges. A lounge area benefits from softer light that does not shine directly into people’s eyes.
This purpose-first approach helps you avoid unnecessary fixtures and creates a calmer, more useful design.
Assess Your Patio After Dark
Before buying lights, walk through the patio at the time you normally use it. Bring a flashlight and inspect the route from the house to the seating area, garden, fire pit, or driveway.
Notice where you hesitate because the surface is difficult to see. Check steps, uneven paving, changes in level, furniture corners, and narrow passages. Then sit in each chair and look toward existing fixtures. A light that seems harmless while standing may be uncomfortable at seated eye level.
Also view the patio from inside the house and from neighboring property boundaries where accessible. Identify light that enters windows or spills beyond your yard.
Take a few photos and mark problem areas on a simple sketch. This gives your patio lighting plan a practical foundation instead of relying solely on decorative inspiration.
1. Create a Warm Canopy With String Lights
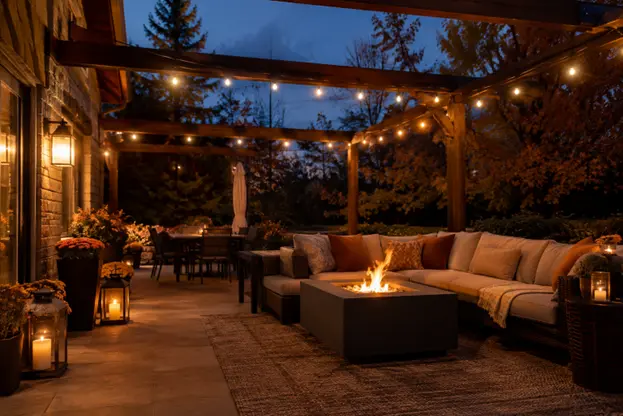
String lights remain one of the most approachable patio ideas because they define an outdoor room without enclosing it. A modest canopy above a dining table or lounge area can make the space feel complete.
Choose a layout that follows the patio’s shape. Parallel strands suit a rectangular dining area, while a perimeter arrangement emphasizes a pergola or courtyard. A simple diagonal can work better than a dense zigzag on a small patio.
Measure the route before ordering, including the distance to the power supply and the amount of drape recommended by the manufacturer. Use outdoor-rated products and suitable support hardware.
For long spans, follow the manufacturer’s support requirements rather than placing excessive tension on the electrical cord. Home improvement guidance recommends secure anchors and appropriate support when hanging outdoor string lights.
Dimmable bulbs are useful when compatible with the selected controls. Keep the patio lighting soft enough for conversation rather than making the canopy the brightest feature in the yard.
2. Add Rechargeable Lamps at Table Height
Portable lamps bring light closer to where people need it. A rechargeable lamp on a side table can make reading, serving drinks, or playing a game easier without increasing brightness throughout the patio.
Choose a shaded design that directs light toward the tabletop. An exposed LED at eye level can be distracting, especially when placed between two people.
For a dining table, one or two smaller lamps may distribute light more comfortably than a single very bright centerpiece. Keep the arrangement low enough that guests can see across the table.
Select products rated for the intended outdoor exposure, and follow storage and charging instructions. Rechargeable does not automatically mean suitable for rain or freezing conditions.
Portable lamps work particularly well when you want to test different arrangements before committing to permanent wiring.
3. Use Lanterns for Flexible Fall Ambiance
Lanterns add a decorative layer that can move with the occasion. Place them on stable tables, broad ledges, or protected surfaces outside walking routes.
Battery-powered lanterns and flameless candles are practical around outdoor textiles, children, and pets. They provide a candlelike effect without introducing an open flame beside cushions or fall decorations.
Group lanterns selectively rather than scattering them across every available surface. One arrangement beside a seating area can create a stronger effect than numerous unrelated pieces.
Lanterns should supplement functional patio lighting. Their glow may make a patio look inviting, but it should not be the only illumination for stairs or an uneven route to the house.
Choose finishes that connect with the furniture or architecture, such as black metal, bronze, or warm wood-look accents.
4. Illuminate Steps Without Creating Glare
Steps deserve attention before decorative features. October rain and fallen leaves can make elevation changes harder to recognize, so light should clearly reveal the tread and edge.
Recessed riser lights, side-mounted fixtures, and suitable under-tread lighting can provide controlled illumination. Position them so users see the walking surface rather than a bright light source.
Inspect the stairway from both directions. Lighting that works while descending may create glare while climbing. Check the top and bottom landings as well, since transitions can remain dark even when the middle steps are illuminated.
For a new patio installation, coordinate step lighting before masonry or paving is finished. For existing stairs, ask an installer which retrofit options minimize cutting and preserve structural integrity.
Keep fixtures and lenses clear of mulch, leaves, and plant growth throughout fall.
5. Guide Guests With Low-Glare Path Lights
A comfortable patio needs a clear connection to the house and surrounding yard. Path lighting helps define that route without requiring the entire landscape to be illuminated.
Choose fixtures that send light down onto the walking surface. Position them where they reveal turns, intersections, steps, and potential obstacles.
Do not follow one spacing measurement blindly. Fixture output, mounting height, beam distribution, path width, and surrounding darkness all affect placement. Test the intended arrangement after dark before finalizing it.
Staggering fixtures can suit an informal garden path, while a restrained symmetrical layout may fit a formal entrance. In either case, avoid excessive brightness.
DarkSky International recommends targeted lighting that stays within the area requiring illumination rather than spilling onto neighboring spaces or into the sky.
6. Highlight Dining Areas With Focused Overhead Light
An outdoor dining table benefits from a defined pool of light. Under a roof or suitable pergola, an outdoor-rated pendant or carefully positioned downlight can create that effect.
Choose the fixture according to the setting. A roofed patio may still receive wind-driven moisture, and an open pergola exposes equipment more directly to weather. Use products listed for their actual location.
The light should reach the tabletop without shining strongly into seated guests’ eyes. A shade, diffuser, or recessed source can help control glare.
Consider how the fixture looks when the table moves. If your furniture layout changes frequently, adjustable or portable lighting may be more useful than a fixed pendant centered over one position.
Use a separate control for dining lighting so it can be reduced after the meal.
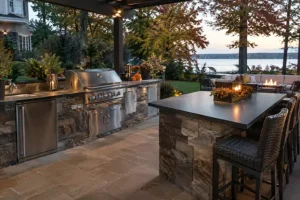
7. Give Grills and Prep Counters Proper Task Lighting
Cooking requires visibility that decorative string lights may not provide. The grill surface, preparation counter, controls, and serving area should be easy to see.
Position task lighting so the cook’s body or grill lid does not block it. Test the location with the lid both open and closed before completing a permanent installation.
Select fixtures appropriate for outdoor exposure and the conditions around cooking equipment. Keep wiring away from hot surfaces, grease, and moving appliance parts.
A focused light at the prep counter can be more useful than increasing brightness across the whole patio. It also allows guests to remain in softer light while cooking continues.
For an outdoor kitchen, coordinate patio lighting, power, appliance specifications, and service access before counters and cabinetry are completed.
8. Integrate Lights Into Walls and Railings
Seat walls, retaining walls, deck rails, and raised patio edges offer opportunities for discreet lighting. Small fixtures beneath capstones or railings can define boundaries without visually dominating the space.
This approach works particularly well where a patio changes level or borders a lower garden. The light can reveal the edge while highlighting stone or brick texture.
Integrated fixtures are easiest to plan during construction. Retrofit work may require drilling, lifting caps, routing cable, or opening finished sections.
Ask how each fixture will be replaced or serviced later. A concealed light is attractive only if necessary components remain accessible.
Avoid treating decorative edge lighting as the only illumination where a significant drop or stairway requires clearer visibility.
9. Frame the Patio With Subtle Garden Lighting
A patio can feel isolated when the surrounding garden disappears into darkness. Carefully selected landscape lighting creates a sense of connection without lighting every plant.
Choose one or two features visible from the seating area, such as a textured wall, ornamental tree, planter, or planting group. Whenever practical, use shielded or downward-directed light to limit unnecessary spill.
Look at the effect from the chairs, not just from beside the fixture. A beam aimed through delicate foliage may look attractive from one angle but glaring from another.
Darkness between illuminated features is valuable. It gives the eye contrast and preserves the character of an October evening.
Use accent lighting selectively and switch it off when it is no longer needed, consistent with responsible outdoor-lighting principles.
10. Create Lighting Scenes With Separate Controls
A patio serves several purposes, and each may need a different lighting arrangement. Separate controls let you adapt without repeatedly unplugging fixtures.
A cooking scene might use focused task lights and clear access lighting. Dinner may call for tabletop illumination and a dimmed canopy. Later conversation may need only soft ambient light and visible steps.
Timers help prevent decorative lighting from operating unnecessarily overnight. Motion sensors can suit occasional-use service routes, though abrupt bright activation may be uncomfortable beside a lounge area.
Check compatibility among bulbs, dimmers, transformers, smart controls, and outdoor enclosures before purchasing.
DarkSky International recommends controls that provide light when needed, allow dimming where possible, and turn lighting off when it is no longer useful.
Choose Color Temperature and Brightness Carefully
Color temperature describes the appearance of light, not how much light it produces. Lower Kelvin values look warmer; higher values appear cooler.
For comfortable patio lighting, approximately 2200K to 2700K is a useful starting range. The National Park Service identifies 2700K as suitable for many outdoor uses and notes that 2200K or amber options may be appropriate in sensitive environments.
Brightness should match the task. Do not buy every fixture at its maximum output simply because it has a higher lumen rating.
Patio area | Lighting goal | Useful approach |
Lounge seating | Comfortable conversation | Soft, shaded ambient light |
Dining table | See food and faces | Controlled tabletop or overhead light |
Grill station | Clear working visibility | Focused task lighting |
Steps | Recognize edges and landings | Shielded step fixtures |
Walkway | Follow a clear route | Downward-directed path lights |
Garden view | Reveal selected features | Restrained accent lighting |
Match visible color temperatures where possible. Mixing golden string lights with stark blue-white path lights can make the design feel disjointed.
Plan Power Before Patio Installation
Lighting works best when power and cable routes are considered before construction. During patio installation, discuss future fixtures, electrical access, conduit where appropriate, controls, and service locations.
Low-voltage systems commonly support path, step, and landscape lighting. Plug-in systems can suit string lights and temporary arrangements. Solar fixtures may work for decorative applications where adequate sunlight is available.
Permanent line-voltage work should be planned and completed by qualified professionals according to applicable requirements. Ask an electrician to verify circuit capacity, outdoor receptacles, GFCI protection, weather-resistant connections, and any necessary permits.
Keep cords outside walking routes. Do not hide extension cords under rugs or use them as a substitute for an appropriate permanent electrical installation.
Good planning reduces the chance of cutting finished paving or removing wall caps later to accommodate overlooked wiring.
Adapt the Plan to Your Patio Size
For a small patio, begin with a door light, one restrained ambient source, and appropriate step or access lighting. A rechargeable table lamp may provide enough additional flexibility without cluttering the space.
On a medium patio, divide the design into dining, lounge, and circulation zones. Give each a purpose rather than using one oversized fixture for everything.
Large patios benefit from selective lighting. Avoid trying to create uniform brightness across the full area. Focus on occupied spaces, clear routes, and a few visual anchors.
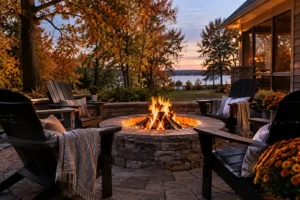
Where a fire feature is present, maintain its required clearances and keep cords, lanterns, and decorations away from heat. Firelight creates atmosphere but should not replace lighting for the route back to the house.
The best patio ideas make the space easier to use, not simply brighter in photographs.
Maintain Patio Lights Through Fall
October maintenance begins with clearing leaves, soil, spiderwebs, and plant growth from fixtures. Dirty lenses reduce useful light and can change the intended distribution.
Inspect string-light strands for damaged insulation, cracked sockets, loose bulbs, and failing mounting points. Remove damaged products from use rather than improvising repairs outside manufacturer guidance.
Check path lights after gardening or heavy rain. Reset leaning fixtures, inspect accessible connections, and have exposed or damaged wiring addressed appropriately.
Adjust timers as evening darkness changes. Review the patio lighting from seated and walking positions after seasonal plants or furniture have moved.
Choose equipment suitable for local weather, including rain and expected temperatures. Follow manufacturer instructions for winter storage, especially for portable lamps and decorative products.
Finally, sweep wet leaves from steps and paving. Lighting supports visibility, but it cannot compensate for a slippery or damaged walking surface.
Avoid These Common Lighting Mistakes
The most frequent mistake is adding too much light before deciding where it is needed. Start with function, then add atmosphere.
Another problem is buying fixtures independently without considering their combined appearance. Color temperature, brightness, finish, and beam direction should work together.
Do not assume a roof makes every fixture suitable for a covered patio. Verify location ratings and installation requirements.
Avoid hanging lights from unverified supports or moving equipment. Retractable awnings, swing chains, and decorative trim should not become improvised attachment points.
For complex wiring, integrated masonry fixtures, tree-mounted lighting, new outlets, or uncertain electrical conditions, hire qualified professionals. Ask for a written plan identifying fixtures, controls, installation scope, service access, and warranty terms.
Enjoy More Comfortable October Evenings With Patio Lighting
A welcoming patio begins with light in the right places. Illuminate steps and walkways first, provide focused visibility for cooking and dining, then add soft ambient light around the seating area.
Ready to make your outdoor evenings more comfortable and inviting? Contact Hawkins Landscaping Inc. for professional patio design and outdoor lighting solutions tailored to your home, yard, and lifestyle.
Whether you want to add dimmable string lights, illuminate garden paths, create a cozy dining area, or plan a complete patio installation, our team can help coordinate your patio ideas with the right layout, durable materials, and practical lighting features. Thoughtful patio lighting can improve visibility, reduce glare, and create a welcoming atmosphere for relaxing or entertaining on crisp October evenings.
With over 50 years of experience serving Frederick County and surrounding areas, Hawkins Landscaping Inc. can help bring your outdoor living vision to life with a design that balances beauty, comfort, and functionality.
Ready to upgrade your patio this fall? Call (301) 898-3615 or visit hawkinslandscaping.com to schedule your consultation. Ask about our flexible financing options for your outdoor project.