Building a deck is one of the best home improvement projects to expand your outdoor living space. Whether you dream of hosting barbecues, relaxing on your porch, or styling outdoor furniture under the roof of a pergola, a deck transforms your yard. If you’re planning your deck installation, here’s a detailed, step-by-step guide packed with the essential information, tools, and experience tips you’ll need to create your dream deck — and avoid costly mistakes!

Step-by-Step Guide to Easy Deck Installation
Step 1: Gather Data, Feedback, and Design Your Dream Deck
Before you lift a tool or buy your first fastener, you need a solid plan.
Collect Inspiration and Information
Start by gathering data:
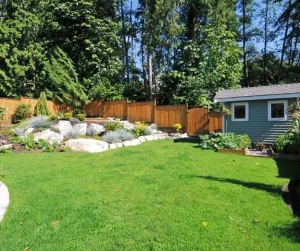
- Look at a map of your property to determine the best spot.
- Observe how the sun, shade, and wind affect the area.
- Think about privacy — do you need a fence or gate?
- Gather feedback from friends, contractors, and neighbors.
Sketch Your Design
Outline key details:
- Shape: Square, rectangular, or curved edges?
- Height: Will you need stairs or a multi-level design?
- Purpose: Relaxation zone, dining area, or hot tub support?
- Style: Traditional wood? Sleek metal railings? Glass balusters?
Use simple software or grid paper to create your first design drafts. Don’t worry if it’s rough — this is about mapping out your ideas.
Step 2: Understand Building Codes and Policies
Each area has specific building codes and policies regarding deck construction.
Before moving forward:
- Check if you need a permit.
- Find out the rules about handrail heights, stairs, structural requirements, and setback distances.
- Some areas even regulate which types of wood or lumber you can use for safety and environmental reasons.
The following codes not only keep you legal, it protect your family and help with future home sales.
Step 3: Select the Right Materials
Choosing the right materials impacts your deck’s durability, look, and maintenance.
Common Material Choices:
- Pressure-Treated Wood: Affordable and widely available. It resists rot and insects but needs regular sealing.
- Composite Decking: Made of recycled materials; low maintenance but more expensive.
- Hardwoods: Naturally beautiful but often pricier and heavier.
- Metal Railings: Durable and modern, pairs well with glass panels.
For framing, always use pressure-treated lumber designed for ground contact. Double-check the warranty on all products and ask about return policy terms, especially with longer lead times due to supply chain fluctuations.
Step 4: Prepare and Measure the Deck Area
Use a tape measure, stakes, and string to outline your deck’s footprint. Accurate measurements are critical — even a few inches off can cause major issues later.
Key Measuring Tips:
- Mark corners carefully and measure diagonals to ensure squareness.
- Mark post and beam locations based on your joist spacing plans (commonly 12″, 16″, or 24″ apart).
- Plan for adequate drainage so water doesn’t collect under your deck or against your home’s foundation.
Using spray paint to highlight key lines and post spots can help visualize the space better.
Step 5: Build a Solid Foundation
Your deck is only as strong as its foundation. Most decks require concrete footings or a concrete slab base.
Steps for a Great Foundation:
- Dig footing holes below the frost line.
- Pour concrete into the holes and set metal brackets while wet.
- Let the concrete cure fully before attaching posts.
Use a level frequently to check that all your footings and posts are aligned and square.
Step 6: Frame the Deck
Now the real fun begins!
Frame Construction Basics:
- Secure beams to your posts with heavy-duty bolts and brackets.
- Attach joists perpendicular to the beams. Secure them using joist hangers and nails or screws.
- Install a rim joist around the perimeter to add stability and a finished look.
- Consider a “picture frame” design where the border runs perpendicular to the main deck boards for an upscale, framed effect.
Using a nail gun or drill makes installation much faster, but precision is key — measure twice, cut once!
Step 7: Install Decking Boards
Lay decking boards starting from the house outward. Fasten them with either hidden fasteners or stainless-steel screws designed for decks.
Best Practices:
- Use a circular saw for clean cuts.
- Leave small gaps between boards (around 1/8 inch) for drainage and wood expansion.
- Pre-drill holes in hardwoods to prevent splitting.
Remember to stagger seams where boards meet for a stronger, better-looking deck.
Step 8: Build Stairs, Railings, and Gates
If your deck is elevated, safe and stylish stairs are a must.
Stairs:
- Calculate the rise (vertical height) and run (depth) carefully.
- Install stringers and secure treads with corrosion-resistant screws.
Railings and Balusters:
- Attach posts securely to framing.
- Choose your look: classic wood, sleek metal, or contemporary glass balusters.
- Install a sturdy handrail that meets local building code height regulations.
If you have pets or small children, add a gate at the top.
Step 9: Seal and Protect
Protect your deck investment!
Final Steps:
- Apply a waterproof sealer to wood decks after the wood has dried.
- Composite decks usually only need an occasional cleaning.
- Register your warranty and review maintenance policies carefully.
Setting up a maintenance schedule ensures your deck will look amazing for years to come.
Common Mistakes to Avoid
- Skipping permit checks.
- Using indoor-rated fasteners outside (they rust quickly).
- Failing to plan for drainage can lead to rot and mildew.
- Not allowing space for the expansion and contraction of decking materials.
- Overloading your deck with heavy furniture without proper framing support.
FAQ: Deck Installation Basics
Can I build a deck by myself?
Yes, with good planning, the right tools, and patience. However, larger or multi-level decks might require professional help.
How long does it take to build a deck?
A basic ground-level deck can take a dedicated DIYer 1–2 weekends. More complex designs may take several weeks.
What’s better: wood or composite decking?
Wood is more affordable upfront, but it needs more maintenance. Composite costs more initially but requires little upkeep and often comes with a longer warranty.
How do I plan drainage for my deck?
Slightly slope the decking (about 1/8 inch per foot) away from the house and maintain board gaps to allow water to drain.
Conclusion
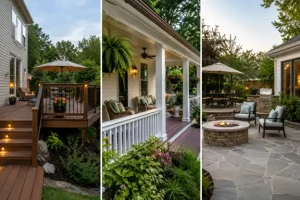
Building your deck is one of the most satisfying home improvement experiences. It’s your chance to shape an outdoor space that truly reflects your life and style — whether that’s a sun-soaked porch with comfy furniture, an entertainer’s dream with built-in seating, or a modern escape with metal accents and sleek glass details.
By following this step-by-step guide, arming yourself with the right information, and gathering feedback along the way, you’ll create something that’s not just a deck — it’s a lasting part of your home and memories.
Are you ready to elevate your outdoor living space with a brand-new deck? Planning the perfect deck installation is an exciting project that adds value, beauty, and functionality to your home. At Hawkins Landscaping Inc., we specialize in turning your dream deck into a reality. Whether you’re looking for a simple patio deck or an elaborate outdoor entertainment area, we’ve got you covered.
Ready to get started? Contact Hawkins Landscaping Inc. today at (301) 898-3615 or visit our website at www.hawkinslandscaping.com for a consultation, and let us help you create the perfect outdoor space! Our team of experienced professionals is here to guide you every step of the way, from design to installation.