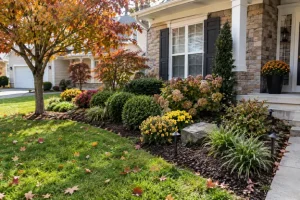
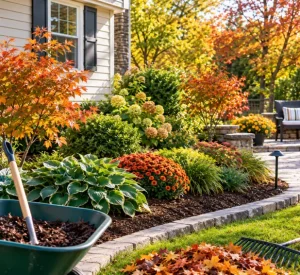
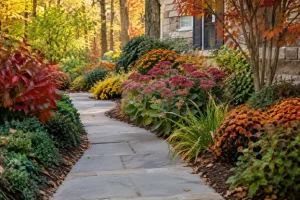
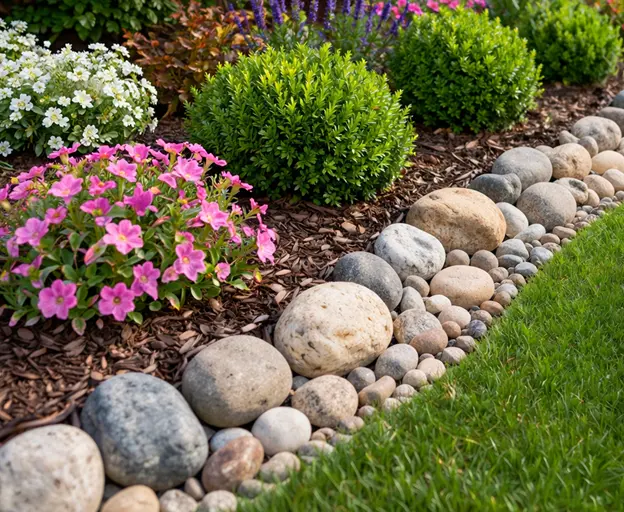
Transforming your outdoor space starts with smart landscaping design, and one of the simplest yet most impactful upgrades you can make is adding natural landscaping edging using rocks and plants. Unlike plastic or metal borders, natural edging blends seamlessly with your environment, creates soft transitions between lawn and garden beds, and requires far less maintenance over time. Whether you’re working with a small front yard or a sprawling backyard, combining stones and landscaping plants gives you endless creative freedom while keeping your landscaping yard neat, defined, and visually stunning.
This guide walks you through 15 natural edging ideas, step-by-step installation tips, the best rock types and plant pairings, cost-saving tricks, and common mistakes to avoid. By the end, you’ll have everything you need to create professional-looking borders that boost curb appeal, save water, and last for years.
Why Choose Natural Landscaping Edging with Rocks and Plants?
Natural edging offers benefits that manufactured products simply can’t match:
- Eco-Friendly: Rocks and plants are sustainable, non-toxic materials that don’t leach chemicals into your soil.
- Low Maintenance: Once installed, stone borders rarely need repair, and drought-tolerant plants reduce watering needs.
- Cost-Effective: Many rocks can be sourced locally or even collected from your property, cutting material costs dramatically.
- Timeless Appeal: Natural materials age gracefully, developing a patina that enhances your garden’s character over time.
- Erosion Control: Properly placed rocks stabilize soil on slopes and prevent mulch from washing away during heavy rains.
- Wildlife Friendly: Plant-filled edges provide habitat for pollinators, beneficial insects, and small birds.
15 Natural Landscaping Edging Ideas Using Rocks and Plants
1. River Rock Border with Creeping Thyme
Smooth, rounded river rocks create a soft, organic line along flower beds, making them a popular choice for natural landscaping edging. Plant creeping thyme (Thymus serpyllum) between the stones for a fragrant, foot-traffic-tolerant edge that blooms with purple flowers in summer.
Best for: Curved garden beds, walkways, and cottage-style gardens.
Installation tip: Lay a 2-inch trench, add landscape fabric, then fill with 3–4 inches of river rock. Plant thyme plugs 6 inches apart along the inner edge.
2. Flagstone Step-Down Edging
Mimic a natural streambed using varied-size rocks arranged in a winding path for creative landscaping edging that also improves drainage. Plant moisture-loving irises, rushes, or cardinal flower along the “banks“.
Best for: Contemporary landscapes, formal gardens, and defining patio perimeters.
Pro tip: Bury one-third of each stone for stability. Angle stones slightly outward for a layered look.
3. Boulder Accent Edging
Large boulders (12–24 inches) make bold statements along driveway edges or property lines. Tuck drought-tolerant perennials like yarrow or blanket flower between boulders for pops of color.
Best for: Rural properties, xeriscapes, and large yards needing dramatic definition.
Cost saver: Source boulders from local quarries or construction sites to reduce delivery fees.
4. Gravel Trench with Ornamental Grasses
Dig a 4-inch deep, 6-inch wide trench, line with weed barrier, and fill with crushed granite or pea gravel. Plant ornamental grasses like fountain grass or blue oat grass along the inner edge for soft movement.
Best for: Modern minimalist gardens, dry climates, and high-traffic areas.
Maintenance bonus: Grasses need only one annual cutback in late winter.
5. Stacked Stone Wall Edge
Dry-stack small to medium fieldstones into a low wall (6–12 inches tall). Plant trailing creeping phlox or candytuft to spill over the edges for a romantic, overflowing effect.
Best for: Sloped yards, terraced gardens, and rustic cottage styles.
Stability secret: Use a slight backward lean (batter) when stacking to prevent toppling.
6. Lava Rock Mulch Border
Dark, porous lava rocks create striking contrast against green foliage. Use as a 3-inch mulch layer along bed edges, paired with silver-leaf plants like lamb’s ear or artemisia.
Best for: Southwestern designs, fire-wise landscapes, and accent beds.
Bonus: Lava rock retains heat, warming soil for early spring growth.
7. Cobblestone Curve Edging
Antique-style cobblestones laid in a flowing curve add old-world charm. Plant dwarf lavender or Russian sage along the inner curve for fragrance and pollinator appeal.
Best for: Historic homes, European-inspired gardens, and front yard focal points.
Design trick: Vary stone heights slightly for a time-worn, authentic look.
8. Mixed-Size Stone Mosaic
Combine small pebbles, medium river rocks, and large accent stones in a random pattern for visual texture. Underplant with creeping juniper or stonecrop for year-round greenery.
Best for: Eclectic gardens, Zen spaces, and artistic focal points.
Pattern tip: Place largest stones every 18–24 inches as anchors, fill gaps with smaller materials.
9. Limestone Chunk Border
Rough-cut limestone chunks create a warm, neutral edge that pairs beautifully with purple coneflowers, black-eyed Susans, or salvia.
Best for: Prairie-style gardens, native plant beds, and Midwest landscapes.
Local advantage: Limestone is often abundant and affordable in central U.S. regions.
10. Slate Shard Edging
Broken slate pieces (shards) set vertically create a sleek, dark border. Contrast with bright yellow coreopsis or orange blanket flower for high-impact color.
Best for: Modern gardens, shade borders, and contemporary front yards.
Safety note: Wear gloves when handling sharp slate edges.
11. Dry Creek Bed Edge
Mimic a natural streambed using varied-size rocks arranged in a winding path. Plant moisture-loving irises, rushes, or cardinal flower along the “banks”.
Best for: Rain gardens, drainage solutions, and woodland-style landscapes.
Function boost: Directs runoff away from foundations while looking decorative.
12. Pebble Mosaic with Succulents
Small, colorful pebbles arranged in patterns (circles, waves) create artistic borders. Tuck hardy succulents like hens-and-chicks or sedum between pebbles for drought-tolerant charm.
Best for: Container gardens, small spaces, and Mediterranean climates.
Pattern idea: Create a simple spiral or wave design using contrasting pebble colors.
13. Fieldstone Rubble Edge
Irregular fieldstones laid loosely create a casual, naturalistic border. Plant native wildflowers like purple coneflower, blazing star, or bee balm for a meadow look.
Best for: Rural properties, wildlife gardens, and informal landscapes.
Eco-win: Provides habitat for ground-nesting bees and beneficial beetles.
14. Crushed Granite Path Edge
Fine crushed granite packed tightly forms a crisp, clean line along paths or beds. Edge with low mounding plants like dwarf mondo grass or creeping Jenny.
Best for: Walkways, vegetable garden borders, and high-traffic zones.
Compaction tip: Wet and tamp granite in 1-inch layers for maximum stability.
15. Rock-Filled Gabion Edge
Wire mesh baskets (gabions) filled with rocks create industrial-chic borders. Plant trailing vines like creeping fig or star jasmine to soften the metal over time.
Best for: Urban lots, modern designs, and erosion-prone slopes.
Longevity perk: Gabions last 20+ years and require zero maintenance.
Best Rocks for Natural Edging: A Quick Comparison
Rock Type | Size Range | Best Use | Cost Level | Durability |
River Rock | 1–6 inches | Curved borders, dry creek beds | $ | High |
Flagstone | 12–24 inches | Formal edges, mowing strips | $$ | Very High |
Lava Rock | 0.5–3 inches | Mulch borders, contrast beds | $ | High |
Fieldstone | 6–18 inches | Rustic walls, natural looks | $$ | Very High |
Crushed Granite | 0.25–0.5 inches | Paths, tight trenches | $ | Medium |
Cobblestone | 3–6 inches | Historic curves, focal points | $$$ | Very High |
Limestone | 4–12 inches | Native beds, prairie styles | $$ | High |
Slate | 2–8 inches | Modern edges, shade gardens | $$$ | High |
*Cost levels: $ = under $50 per ton, $$ = $50–150 per ton, $$$ = over $150 per ton.*
Top Landscaping Plants for Rock Edging
Choose plants that thrive in rocky, well-drained soil and tolerate heat reflection from stones:
Ground Covers (Spillers)
- Creeping Thyme – Fragrant, purple blooms, foot-traffic tolerant.
- Creeping Phlox – Spring color carpet, evergreen foliage.
- Sedum ‘Dragon’s Blood’ – Red foliage, drought-proof.
- Creeping Jenny – Golden trails, shade-tolerant.
- Candytuft – White spring flowers, compact habit.
Low Mounding Plants (Fillers)
- Blue Fescue – Steel-blue grass tufts.
- Dwarf Lavender – Fragrant, pollinator magnet.
- Lamb’s Ear – Silvery, soft foliage.
- Hens-and-Chicks – Succulent rosettes, zero water needs.
- Dwarf Mondo Grass – Dark green, shade-loving.
Accent Perennials (Thrillers)
- Yarrow – Flat-top blooms, drought-tolerant.
- Blanket Flower – Red-yellow daisies, long bloom time.
- Purple Coneflower – Native, pollinator favorite.
- Russian Sage – Airy purple spikes, deer-resistant.
- Coreopsis – Bright yellow, self-seeding.
Ornamental Grasses
- Fountain Grass – Plume tops, movement in wind.
- Blue Oat Grass – Steel-blue blades, compact.
- Japanese Forest Grass – Shade-loving, golden stripes.
Vines (for Gabions/Walls)
- Creeping Fig – Evergreen, clings to stone.
- Star Jasmine – Fragrant white flowers, semi-evergreen.
Planting spacing guide: Ground covers every 6–8 inches, mounding plants every 12–15 inches, accent perennials every 18–24 inches.
Step-by-Step Installation Guide
Tools & Materials Needed
- Shovel or spade
- Garden hose or spray paint (for marking)
- Landscape fabric (weed barrier)
- Rubber mallet
- Level (for flat stones)
- Gloves and safety glasses
- Rocks of choice
- Selected plants
- Compost or planting soil
- Watering can or hose
Installation Steps
Step 1: Plan and Mark
Use a garden hose or spray paint to outline your desired edge. Step back and adjust curves until satisfied. For straight lines, use stakes and string.
Step 2: Dig the Trench
Excavate a trench 4–6 inches deep and 6–12 inches wide, depending on rock size. Keep edges clean and uniform.
Step 3: Add Weed Barrier
Line the trench with landscape fabric, overlapping seams by 6 inches. This prevents weeds while allowing drainage.
Step 4: Place Rocks
Start with largest stones as anchors, then fill gaps with medium and small rocks. For vertical edging, bury one-third of each stone for stability.
Step 5: Plant Integration
Dig planting holes along the inner edge, amend soil with compost, and install plants at the same depth as their nursery pots. Water thoroughly.
Step 6: Mulch and Finish
Add a 1–2 inch layer of complementary mulch (gravel, bark) behind the rock edge to suppress weeds and retain moisture.
Step 7: Water and Settle
Water deeply for the first two weeks to help plants establish. Check rock stability after heavy rains and adjust as needed.
Common Mistakes to Avoid
- Skipping Weed Barrier: Leads to constant weeding between rocks.
- Using Uniform Rock Sizes: Looks artificial; mix sizes for natural appeal.
- Planting Too Close to Rocks: Roots need room; leave 2–3 inches between plant crowns and stones.
- Ignoring Drainage: Ensure water can flow through rock layers to prevent pooling.
- Choosing High-Water Plants: Defeats the low-maintenance goal; stick to drought-tolerant species.
- Shallow Trenches: Rocks shift and tip; bury at least one-third of vertical stones.
- Overcrowding Plants: Leads to disease and poor air circulation; follow spacing guidelines.
Maintenance Made Easy
Natural rock and plant edging is famously low-care, but these simple tasks keep it looking pristine:
- Weed Quarterly: Pull any invaders by hand; spot-treat with vinegar solution if needed.
- Rocks Rinse: Hose off dust and debris annually to restore color.
- Plant Pruning: Trim back overgrowth in early spring; deadhead flowers for extended blooms.
- Rock Top-Up: Add fresh stones every 3–5 years if settling occurs.
- Mulch Refresh: Replenish organic mulch behind rocks annually to suppress weeds.
Time commitment: 1–2 hours per year for a typical 100-foot border.
Ready to Transform Your Yard?
Natural landscaping edging using rocks and plants is one of the smartest upgrades you can make to your landscaping yard. It combines beauty, function, and sustainability while dramatically reducing long-term maintenance. Whether you choose a simple river rock border or an elaborate stacked stone wall, the results will elevate your landscaping design and create a welcoming outdoor space you’ll enjoy for decades.
Start small, think big, and let nature do the heavy lifting. Your dream garden edge is just a shovel and a few stones away.
Start Your Landscaping Edging Project Today!
Don’t let another season pass with blurry, weed-filled bed lines. Grab your shovel, choose your favorite rocks and landscaping plants, and start creating a clean, natural edge that transforms your yard this weekend.
Show off your results! Share your before-and-after photos, tag us on social media, or leave a comment with your favorite edging idea—we’d love to see your work. Need personalized advice? Ask your questions and get expert guidance to help your landscape stand out.
For professional results without the hassle, trust Hawkins Landscaping Inc.. With over 50 years of experience serving Frederick County and surrounding areas, we provide expert landscaping edging, planting, and full landscaping design services to keep your yard looking sharp and well-defined year-round.
Call (301) 898-3615 or visit hawkinslandscaping.com to schedule your consultation. Ask about our flexible financing options and let’s bring crisp, beautiful borders to your landscape.