A clean edge and fresh mulch can make any yard look tidy and beautiful. When done right, edging and mulching highlight your landscaping plants, define garden beds, and pull all your landscaping ideas together into one smooth, attractive design. When done wrong, they can actually ruin your landscaping design, make your yard harder to care for, and even harm your plants.
In this guide, you will learn the most common edging and mulching mistakes homeowners make and how to avoid them. With simple changes, you can protect your plants, save time, and keep your yard looking sharp all year long.
Common Edging and Mulching Problems in Landscaping Design
Small edging and mulching mistakes can make even a well-planned yard look messy or difficult to maintain. From uneven borders to improper mulch depth, these common issues can affect the health of your landscaping plants and weaken the overall landscaping design of your outdoor space.
1. Using Too Many Edging Styles at Once
One of the biggest mistakes is using many different edging materials and styles in the same yard. You may see plastic edging in one area, bricks in another, metal in a third spot, and a natural trench edge somewhere else. This mix makes the yard feel busy, choppy, and random instead of calm and pulled together.
Why this hurts your landscaping design:
- It distracts from your landscaping plants, which should be the main focus.
- The yard feels smaller and more cluttered.
- It looks like the yard was built in pieces, not planned as a whole.
How to fix it:
- Choose one main edging style for most of your beds.
- If you use a second type, keep it limited (for example, only around a patio or a special feature).
- Make sure the color and texture of the edging match your home and your overall landscaping ideas.
A simple, consistent edging style will frame your beds like a picture frame, making your plants stand out and giving your yard a professional, finished look.
2. Installing Edging Too High or Too Low
Edging that sits too high above the soil or too low below it can cause problems. Many homeowners push edging too far into the ground or leave it sticking up like a little wall.
Problems with edging that is too high:
- It looks harsh and unnatural.
- It is easy to trip on or hit with the mower.
- Mulch and soil can run down and pile against the edge, creating a messy look.
Problems with edging that is too low:
- Grass and weeds easily creep into the flower beds.
- Mulch washes out into the lawn during rain.
- The edge line becomes hard to see and loses its purpose.
How to get it right:
- Aim for the top of your edging to sit just slightly above the soil or lawn level, not several inches higher.
- Follow the natural slope of the lawn so the edge looks smooth, not bumpy.
- When using brick or stone, set them so only the top is visible; the rest should be stable in the soil.
Well‑set landscaping edging makes mowing easier, keeps mulch in place, and adds a neat outline without stealing attention from your plants.
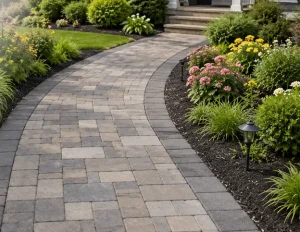
3. Creating Edges with Sharp, Awkward Shapes
Some people think more curves and tight waves mean more interest. In reality, edges with odd, zigzag shapes or very tight curves are hard to maintain and often look messy.
Why awkward shapes are a problem:
- Mowers and trimmers struggle to follow tight curves.
- Grass and weeds sneak into small pockets and corners.
- The flow of the yard feels broken, not smooth.
Better approaches:
- Use gentle curves or clean straight lines.
- Make bed shapes large enough for your landscaping plants to grow without spilling over the edge right away.
- Repeat similar shapes in different parts of the yard so the design feels united.
Imagine your edging as a simple line that guides the eye. Smooth lines make your landscaping design feel calm and intentional.
4. Skipping a Real Edge and Relying Only on Mulch
Another common mistake is skipping edging altogether and just dumping mulch in a loose, rough shape. Without a defined edge, mulch spreads into the lawn, grass creeps into the bed, and the whole area quickly looks unkept.
Why a defined edge matters:
- It clearly separates lawn from bed.
- It makes mowing and trimming easier and faster.
- It helps keep mulch where it belongs.
- It gives a finished, professional look even with simple landscaping ideas.
If you do not want a visible border like bricks or metal, you can still create a natural edge:
- Cut a shallow “trench” edge along the bed with a shovel or edging tool.
- Keep it about 3–4 inches deep and slightly angled.
- Refresh the edge a couple of times a season to keep it crisp.
A simple cut edge with clean mulch can look just as good as expensive materials when it is done well.
5. Using the Wrong Mulch for Your Yard
Not all mulch is the same. Using the wrong type can affect the health of your landscaping plants and the look of your yard.
Common mulch problems:
- Brightly dyed mulch that looks fake or fades quickly.
- Large, chunky mulch that blows away in the wind.
- Very fine mulch that packs down and blocks water.
- Rock or gravel mulch used around plants that like cool, moist soil.
Instead, choose mulch that matches your goals:
- Shredded hardwood or bark for flower beds and shrubs.
- Pine straw for natural or woodland‑style landscaping ideas.
- Stone or gravel for dry, hot areas or around plants that prefer sharp drainage.
Pay attention to color too. Dark brown or black mulch often makes green plants and colorful flowers stand out, while very light mulch can wash out delicate plants and show dirt and debris more easily.
6. Mulching Too Deep and Suffocating Plants
“More mulch is better” is a common belief, but it is not true. Too much mulch can be just as harmful as too little.
Problems with deep mulch:
- Roots may grow up into the mulch instead of staying in the soil, where they belong.
- Soil beneath the mulch can stay too wet, leading to rot.
- Insects and rodents may hide in thick layers.
- Mulch may block oxygen from reaching the roots.
A good depth:
- About 2–3 inches of mulch in most planting beds.
- A little less for heavy clay soils and a little more for sandy soils, but still not more than roughly 3 inches.
Before adding new mulch each year, check the depth. You may only need a light “top‑off” or color refresh, not a full new thick layer. Too many layers year after year can build up like a heavy blanket over your landscaping plants.
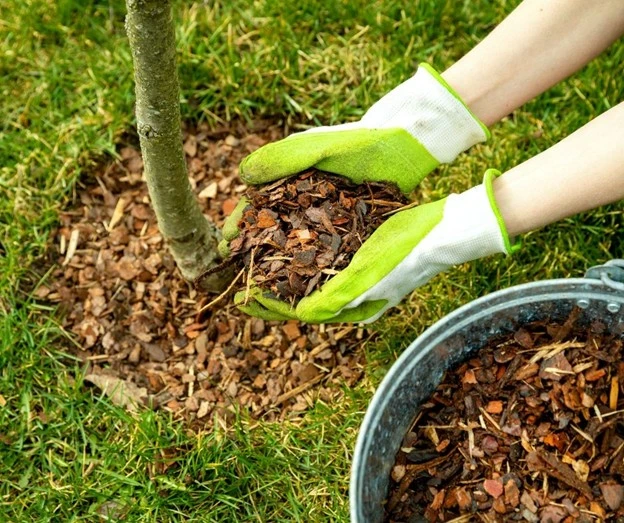
7. Piling Mulch Against Tree Trunks (“Mulch Volcanoes”)
One of the most harmful mulching mistakes is piling mulch high around the base of a tree, making a mound that looks like a volcano. Many professional crews even do this by habit, but it is very bad for the tree.
Why mulch volcanoes are dangerous:
- They keep the bark wet, which can lead to rot and disease.
- They invite insects and rodents to chew the trunk.
- They cause roots to grow in the mulch layer and circle the trunk, which can choke the tree over time.
- The tree becomes weak and more likely to fail.
How to mulch trees correctly:
- Keep mulch pulled back 3–6 inches from the trunk.
- Spread mulch in a wide ring, not a tall pile.
- Maintain a flat or slightly doughnut‑shaped ring, not a cone.
Trees are often the most valuable landscaping plants in your yard. Protect them by breaking those mulch volcanoes down and mulching in a gentle, wide circle instead.
8. Burying Shrubs and Perennials in Mulch
Just like trees, shrubs and perennials can suffer when mulch covers their stems or crowns (the base where stems meet roots).
What goes wrong:
- Stems can rot from constant moisture.
- New shoots struggle to push through thick layers.
- Plants may become more prone to pests and disease.
Best practice:
- Keep mulch a small distance away from stems and crowns.
- Mulch the soil around the plant, not the plant itself.
- After spreading mulch, gently brush it back from plant bases with your hand.
When your landscaping plants have a little breathing room, they stay healthier and show off better against the clean mulch background.
9. Ignoring Weed Control Before Mulching
Some people throw mulch straight on top of existing weeds or grass, hoping to smother everything. In most cases, this does not work well. Many weeds still grow through, and their roots become harder to remove.
Better steps:
- Pull or dig out weeds, including roots, before you mulch.
- For tough areas, you may use landscape fabric or cardboard under paths or non‑planting zones, but avoid suffocating future planting areas.
- Keep bed edges clean so grass does not quickly creep back in.
Mulch helps slow weeds, but it is not a magic fix by itself. Good edging, proper depth, and regular light weeding are all part of a clean landscaping design.
10. Choosing Edging that Fights Your Plants
Some edging materials look great on day one but do not work well with certain landscaping plants as they grow.
Common problems:
- Tall, rigid edging around beds with spreading groundcovers or perennials that spill over in a messy way.
- Thin plastic edging that bends or pops out when larger roots grow nearby.
- Sharp metal edging next to soft, cottage‑style plants that would look better with a natural edge.
To avoid these issues:
- Match the height and strength of your edging to the mature size of nearby plants.
- Use flexible edging or natural trench edges in beds with many spreading plants.
- Save tall, solid edging for places where you truly want a hard barrier, such as keeping gravel in place or separating lawn from a raised bed.
Good landscaping edging works with your plants, not against them. It should guide and frame, not box everything in too tightly.
11. Letting Edges and Mulch Go Untouched for Years
Even the best edging and mulching job needs care over time. One mistake is assuming you can set it and forget it.
What happens when you ignore it:
- Edges become buried in soil, grass, and debris.
- Mulch fades, breaks down, and becomes thin or patchy.
- Weeds and grass slowly take over bed edges.
- Your landscaping design loses its sharp, clean lines.
Simple maintenance habits:
- Re‑cut or clean up natural edges a couple of times a season.
- Rake mulch lightly to fluff it and remove compacted layers.
- Top off mulch with a thin layer when needed, not heavy loads every year.
- Check edging for shifting, gaps, or broken pieces and fix them promptly.
Short, regular checks keep your landscaping ideas looking fresh without huge weekend projects.
12. Forgetting to Match Edging and Mulch to Your Home Style
Your edging and mulch should support the overall look of your home, not fight it. A rustic, country‑style home with shiny black metal edging and bright red mulch can feel off. A clean modern home with crumbling wood edging and faded mulch can also feel mismatched.
Tips for matching style:
- For modern or contemporary homes: sleek metal edging, straight lines, and dark or neutral mulch.
- For traditional or cottage homes: brick, stone, or natural trench edging with warm brown mulch.
- For natural or woodland landscaping ideas: no visible edging or rough stone edges with bark or pine straw mulch.
Look at your siding, roof, and hardscape (walkways, patio, driveway) and repeat some of the same colors and textures in your edging and mulch choices.
13. Not Planning Around Water and Drainage
Edging and mulch can change the way water moves through your yard. Many people forget this and end up with puddles, washed‑out mulch, or soggy plant roots.
Water‑related mistakes:
- Edging that traps water against a house or foundation.
- Mulch beds that slope toward, not away from, buildings.
- Light mulch used on steep slopes that washes into the lawn or onto sidewalks.
How to avoid problems:
- Make sure the soil under mulch slopes gently away from your house.
- Use heavier mulch or stone on slopes and secure the edge so it does not wash out.
- Leave small breaks in edging in low spots so water can drain if needed (away from buildings and patios).
Good drainage protects both your landscaping plants and your home.
14. Ignoring the Power of Simple, Repeated Patterns
One of the biggest design mistakes is forgetting that simple, repeated patterns look more professional than lots of random different looks. This is true for both landscaping edging and mulching.
Instead of:
- Mixing many colors of mulch.
- Switching edge materials every few feet.
- Changing bed shapes every time you start a new area.
Try:
- Choosing one mulch color and using it in all visible beds.
- Using the same edging type in front and back yards.
- Repeating similar curves or straight lines throughout the landscape.
This creates unity. Your landscaping plants and features become the stars, and the edges and mulch support them quietly in the background.
Protect Your Landscaping Design with Proper Edging and Mulching
If you are tired of messy edges, washed‑out mulch, and beds that never look quite right, it is time to fix the small mistakes that are holding your yard back. The right landscaping edging and mulching practices can protect your landscaping plants, sharpen your lawn lines, and bring all your landscaping ideas together into a clean, beautiful design.
Reach out to the experts at Hawkins Landscaping Inc. today for professional help with edging, mulch selection, and complete landscaping design.
With over 50 years of experience serving Frederick County and surrounding areas, our team will evaluate your yard, correct common landscaping issues, and create a simple, low-maintenance plan that keeps your outdoor space looking neat, healthy, and welcoming in every season.
Call (301) 898-3615 or visit hawkinslandscaping.com to schedule your consultation. Ask about our flexible financing options and let’s bring lasting beauty and structure to your landscape.